 What is “Cuneiform,” you ask? Well, a few years ago, we discovered this ancient form of writing in our favorite whole-school homeschool curriculum, My Father’s World (MFW), and we found a specially tasty way to study cuneiform, too. Cuneiform is “a system of writing first developed by the ancient Sumerians of Mesopotamia c. 3500-3000 BCE. It is considered the most significant among the many cultural contributions of the Sumerians…” So in short, it’s a neat form of ancient writing in which lines and wedge-shaped characters were used to create a unique system of letters that were impressed on clay tablets. In our world of ArtEase!, it initially appeared to be an artistic form of communicating, much like the Egyptian’s hieroglyphics. It was something we tried drawing, writing, and creating our own cuneiform letters using play dough or clay. But then, we had an aha moment… COOKIES! How better to celebrate the discovery of a new form of lettering and communication than to add a taste of flavor into the mix? It was a funtastically grand idea and activity. You should definitely try this at your homeschool. 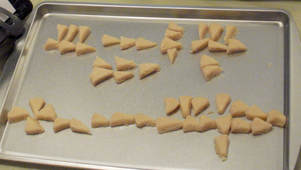 Here's how we created our cuneiform cookies:
If you try this fun activity, remember to spread your letters out farther than you may think because they will spread during the cooking process. They will still be just as scrumptious, but not as picture perfect in one big splat (like ours turned out). :)
I hope you’ll partake in taking your study of cuneiform to another (edible) level by trying this idea. This works well with other shape-styled lettering, too. As always, follow and friend us on Facebook, Twitter, Pinterest, and Instagram, and let us know how your homeschool engages in the study of writing and lettering. Enjoy! :) Comments are closed.
|
MasterTreatsMany of the recipes and food-art ideas found here have been collected from various customized ArtEase! activities, selected school curricula, cookbooks, and shareable online material. (NOTE: not ALL mastertreats are sweet) Archives
August 2018
Categories |
 RSS Feed